
How White Label GPS Software Customisation Works
Four-step white label GPS setup: brand, connect devices, build dashboards/alerts, and secure user access with UK defaults.
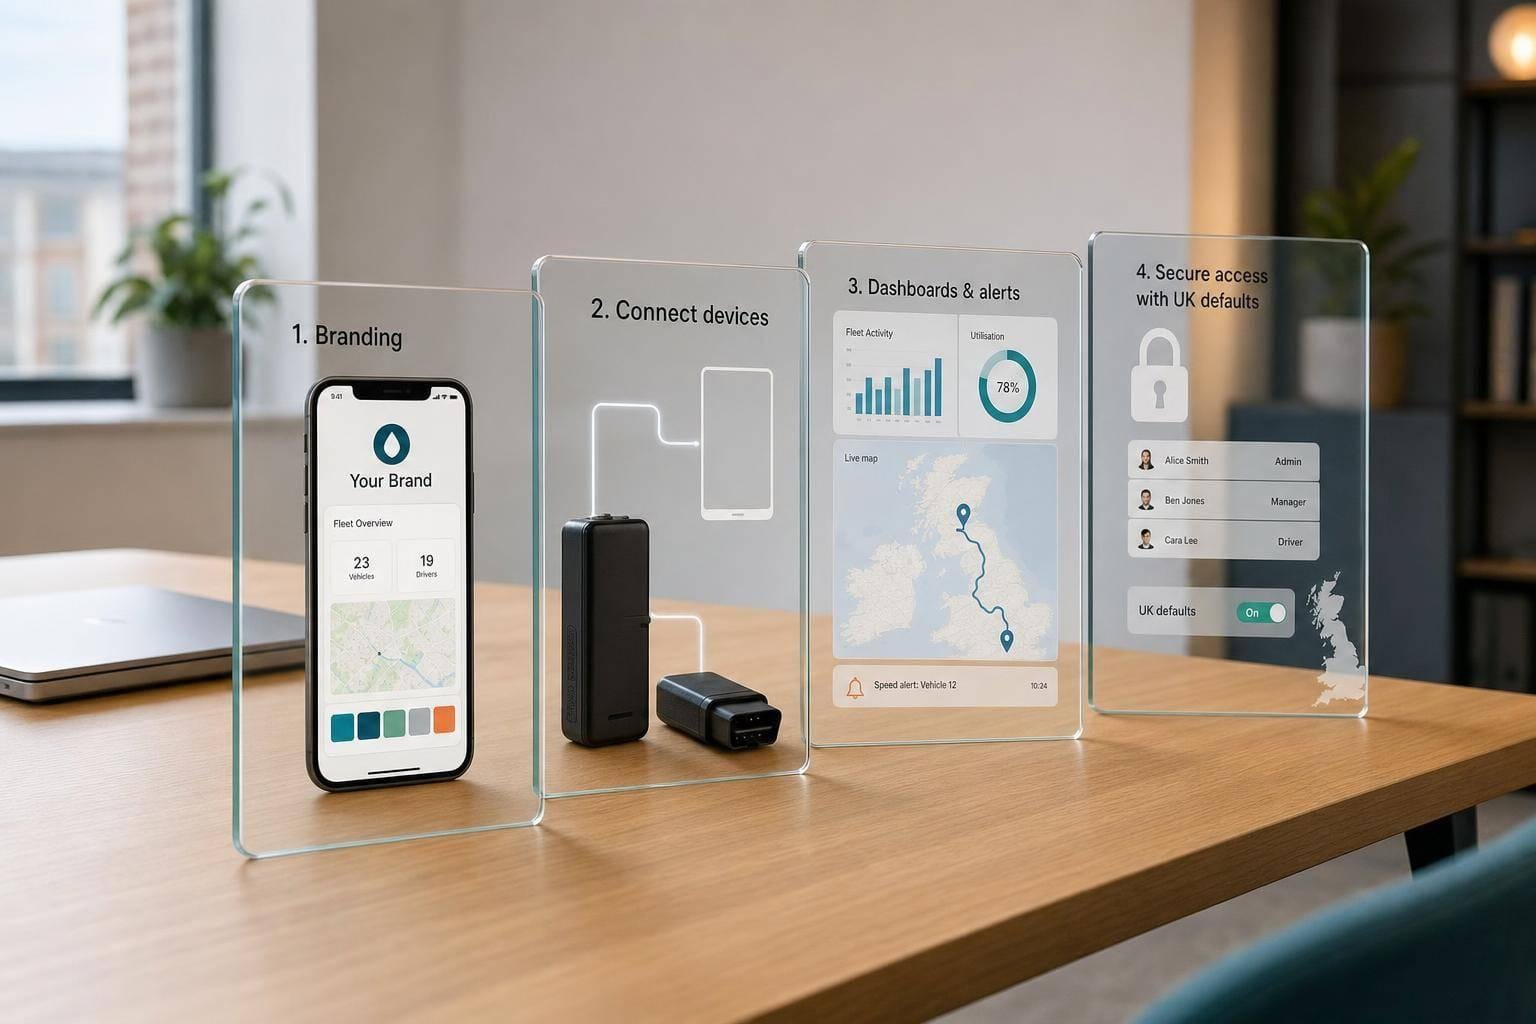
You do not need to build fleet tracking software from scratch to sell it under your own brand. In most cases, I’d break the job into 4 steps: brand the platform, connect devices and vehicles, set up dashboards and alerts, then lock down user access and test everything before launch.
Here’s the short version:
- Step 1: I set the brand layer first - domain, HTTPS, logo, colours, email settings, and UK defaults like £, DD/MM/YYYY, 24-hour time, and miles
- Step 2: I connect each tracker to the right vehicle, check live GPS data, and sort vehicles into groups such as depots, regions, or customer accounts
- Step 3: I build role-based dashboards, create alert rules for speeding and geofences, and schedule reports in PDF, CSV, or XLSX
- Step 4: I restrict what each user can see, test the customer portal and mobile access, and run launch checks on data, alerts, reports, branding, and privacy settings
A white label GPS platform usually covers the same core parts: live tracking, maps, alerts, reports, user roles, and customer logins. The main job is not building those parts. It is setting them up in the right order so the portal works as if it were your own system.
A few numbers from the setup process stand out:
- I’d keep dashboards to 8–12 widgets
- I’d test alert rules with a 2-week pilot
- I’d usually work with 5 user roles: administrator, fleet manager, dispatcher, read-only user, and customer contact
- I’d test 3 customer tasks before go-live: find a vehicle, open a trip report, and export a PDF
The big point is simple: brand first, data second, user views third, launch checks last. If I get the device mapping, vehicle groups, and permissions right early on, the rest of the setup is much easier to control.
The rest of the article walks through that process in order, using plain UK fleet examples and launch checks that fit day-to-day use.
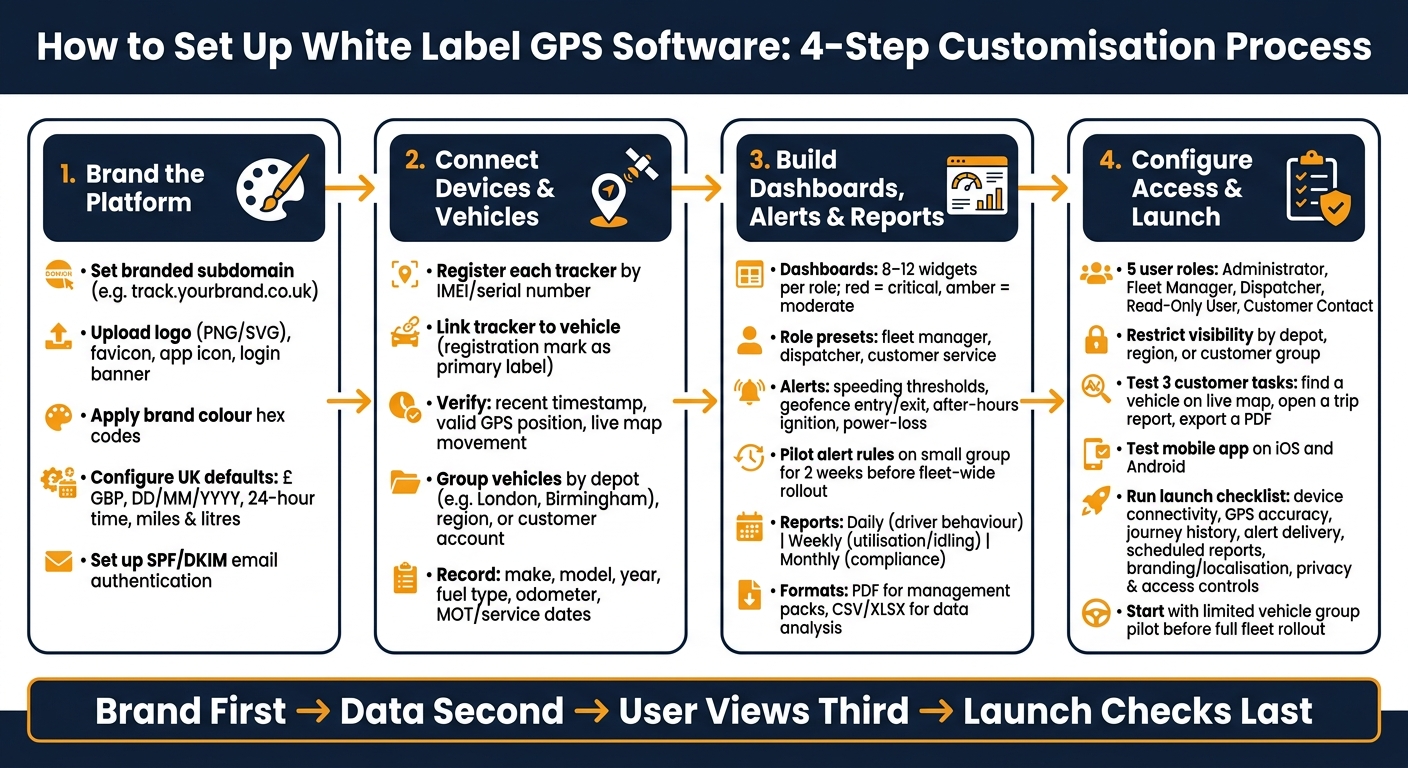
White Label GPS Software Setup: 4-Step Customisation Process
Step 1: set up branding, domain and core platform settings
Before you add any vehicles, get the platform looking and feeling like your brand. That means putting the brand layer in place first, then setting up the fleet structure behind the scenes.
Connect a branded tracking subdomain and enable HTTPS
Pick a short subdomain that clearly points to tracking, such as track.yourbrand.co.uk or fleet.yourbrand.co.uk. Then create a CNAME record for that subdomain, add it in the platform admin, and confirm HTTPS is active once the DNS change has gone through.
It’s worth doing a quick check at this stage. Make sure logos, scripts and maps all load over HTTPS too. If one part still loads over HTTP, it can look messy and cause browser warnings.
After the domain is live, move on to the visual side.
Apply logos, colours, emails and UK defaults
Upload your logo in PNG or SVG format, along with a square app icon, a favicon and a login banner. Add your brand colour hex codes for buttons, highlights and backgrounds, then check that status colours are still easy to read on maps and dashboards.
Next, set the sender name and sender address, and add SPF and DKIM records. This helps your emails look right and land where they should.
For UK defaults, use:
- GBP (£)
- DD/MM/YYYY date format
- 24-hour time
- miles and litres
With branding and defaults in place, you can move on to organising vehicles and UK fleet tracking tools.
Where GRS Fleet Telematics fits
GRS Fleet Telematics can help at this stage with white label branding, UK tracking devices and real-time GPS tracking under your own domain and visual identity.
sbb-itb-499a7f0
Step 2: add tracking devices, assign vehicles and build groups
Once branding and default settings are in place, the next job is to connect the platform to the actual kit in the field. This is the point where a branded interface starts working like a live fleet system.
Register each device and link it to the correct vehicle
Register each tracker using its IMEI, serial number or device ID, then connect it to the right vehicle record. In most cases, the registration mark should be the main label. If the vehicle identity changes but the asset remains the same, add an internal fleet number too.
After linking the device, make sure it’s sending data properly. Check for:
- a recent timestamp
- a valid GPS position
- live movement on the map
Do that before moving to the next vehicle.
Once each tracker is matched, sort the fleet into groups so managers and customers only see the vehicles that matter to them.
Organise vehicles into depots, regions or customer groups
Grouping keeps the platform easier to run at scale and helps with permissions and reporting. In UK fleets, common setups include grouping by depot or branch such as London, Birmingham or Manchester, by region or territory such as Midlands Engineers or Northern Scotland Routes, or by customer account such as a leased vehicle pool or a council contract fleet.
Roles decide what each user can view, edit and export. Groups then decide which vehicles show on a manager’s dashboard, which vehicles appear in scheduled reports, and which assets a customer can view after logging in.
Set a documented naming convention before adding large volumes of vehicles. It saves a lot of mess later. Those same groups then feed dashboards, permissions and scheduled reports.
Add useful fleet data at setup
The data you add here has a direct effect on how useful your reports will be later. For each vehicle, record make, model, year, fuel type, current odometer reading and MOT and service due dates in DD/MM/YYYY format.
Fuel type and vehicle class feed into emissions analysis, which matters for operators dealing with Clean Air Zone rules. Odometer readings taken at installation help line up GPS-calculated mileage with on-road figures, which keeps service intervals and mileage claims accurate.
For driver assignment, pool fleets tend to work better with driver ID tags or RFID cards. That way, speeding, idling and harsh-braking events attach to the right person, no matter which vehicle they used.
This information feeds the dashboards, alerts and reports in the next step.
Step 3: customise dashboards, alerts and reports
Use those groups to build dashboards, alerts and reports for each role. The key is consistency. When you use the same vehicle groups across every view, everything stays in sync and people aren’t left comparing mismatched data.
Build dashboards for different team roles
Different teams need different views of the same fleet data. Fleet managers usually care about live status and compliance. Dispatchers need filtered maps and live ETAs. Customer service teams need arrival times and exceptions so they can answer questions without digging around.
Keep each dashboard to 8–12 widgets. Any more than that, and the screen starts to feel crowded. Use colour-coded indicators so people can spot issues at a glance - red for critical events and amber for moderate ones. Then save each layout as a role preset, so new users get the right setup from day one.
Set alerts for speeding, geofences and suspicious activity
Once the dashboards are set, use those same groups to build alert rules. Set both minor and critical speeding thresholds by vehicle group. Add repeat-event thresholds too, so people don’t get flooded with the same warning over and over.
For geofences, draw boundaries around depots, customer sites and restricted zones. Focus the rules on after-hours entry and exit rather than every single movement. Otherwise, alerts turn into background noise and people stop paying attention.
After-hours movement alerts - triggered when the ignition turns on outside defined working hours - are particularly useful for theft prevention. It also makes sense to pair them with power-loss alerts on high-risk vans, especially those carrying tools or equipment.
Before you roll anything out fleet-wide, test each alert rule on a small vehicle group. A two-week pilot is the safest way to spot threshold issues before they hit the whole fleet. Check that each notification goes to the right person and arrives in the right format.
Create reports with UK-friendly formats and schedules
Use the same groups again when you schedule reports. That way, dashboards, alerts and reports all line up. Schedule trip history, idling, utilisation and compliance reports on a daily, weekly or monthly basis, depending on who needs them and how often they act on the data.
A simple pattern often works well:
- Daily driver behaviour summaries for operations teams
- Weekly utilisation and idling reports for fleet managers
- Monthly compliance and service reports for contract reviews
Send reports by email automatically in PDF when people need a fixed-layout management pack, or in CSV/XLSX when they need to work through the numbers in more detail. Keep the same platform date, time and currency formats throughout.
For customer reports, keep the scope tight. Show only on-time arrivals, visit history and average delay tied to that customer’s own contract data.
Step 4: configure customer access and run pre-launch checks
Once roles, alerts and reports are set up, the next job is to lock down access and test the customer experience before go-live.
Set user roles and restrict vehicle visibility
Use five roles: administrator, fleet manager, dispatcher, read-only user and customer contact.
Administrators control branding, billing, user management and system settings. Fleet managers oversee vehicles, drivers and reports across the whole fleet or within a set region. Dispatchers handle day-to-day work, such as live tracking and route oversight. Read-only users can view data without making changes. Customer contacts should see only their own vehicles, alerts and reports.
Access should also be limited by depot, region or customer group. That way, a North West depot manager sees only the vans based there, and a customer contact never sees another client’s fleet. It keeps the interface simpler for non-technical users and cuts the risk of accidental data exposure.
Once access is in place, test the customer view from start to finish.
Check the branded customer portal and mobile access
Test the portal like a first-time customer would. Open the login page under your branded domain, make sure the logo and colours are right, and check that the navigation is easy to follow. Menu labels should be plain and clear. Customer-facing pages should use en-GB spelling and DD/MM/YYYY date formats.
Then test three tasks without help:
- Find a vehicle on the live map
- Open a trip report
- Export a PDF
If any of those takes more than a few clicks, the navigation needs work.
If the platform includes a mobile app, test it on both iOS and Android. Check that live tracking loads fast, alerts arrive as push notifications, and the app still works well on a smaller screen.
Run a launch checklist before going live
Start with a limited vehicle group, then roll it out across the full fleet once the checks pass. A small pilot gives you room to catch issues before they spread.
| Check area | What to verify |
|---|---|
| Device connectivity | Every tracker is online, reporting at the expected interval, and matched to the correct vehicle |
| GPS accuracy | Location updates appear on the live map and are stable under normal operating conditions |
| Journey history | Trips are recording accurately, including start/stop times and route detail |
| Alert delivery | Speeding, geofence and tamper alerts reach the right recipients by email, app or SMS |
| Scheduled reports | Reports send at the correct time, to the correct users, with accurate data and proper UK date formatting |
| Branding and localisation | Logo, colours, domain and en-GB copy match across login, portal, emails and PDFs |
| Privacy and access controls | Role-based permissions are active, HTTPS is enabled, session time-outs are configured, and audit logs are recording key actions |
Use the pilot to fix permissions, alert rules and report formatting before full rollout.
Conclusion: how the customisation process comes together
White label GPS customisation follows a set order: brand first, then devices and vehicle groups, then branded dashboards, alerts, reports and access controls. That sequence matters. Each stage relies on clean data from the one before it.
If device mapping is accurate, user roles are clear, and reports are set up in the right format, the platform is far more reliable from day one. That’s why pre-launch checks matter before go-live.
When the process is handled in the right order, you end up with a branded platform that feels purpose-built and works exactly as customers expect. This structured approach is essential for supporting fleet growth and maintaining long-term brand value.
FAQs
How long does white label GPS setup usually take?
Setup time depends on the route you take. With a pre-built dashboard, you can start analysing fleet data in minutes to a few weeks.
A fully custom dashboard built from scratch usually takes three to twelve months. To keep deployment smooth, set a clear installation window early and factor in any operational constraints.
What data should I gather before setup starts?
Before setup starts, pull together the key details from your planning work. That way, the technical side lines up with what the business is trying to do.
Include:
- your current systems, such as TMS, HR software, and accounting platforms
- your data needs, update schedules, and compliance goals, including a UK GDPR privacy impact assessment
- at least three months of baseline performance data
- a complete inventory of all assets and endpoints
This step matters more than it might seem. If you skip it, setup can drift away from the original plan, and small gaps at the start often turn into bigger problems later.
How do I know the platform is ready to launch?
Test the platform fully in a sandbox environment with synthetic data before you go live. At this stage, it’s worth checking every tracking device in the portal to make sure each one is assigned to the right asset and mapped as expected.
Then run road tests in places with reliable network coverage. The goal is simple: confirm that location updates are accurate, geofence alerts fire at the right time, and ignition status changes show up properly.
You’ll also want to check that the setup lines up with UK requirements, including GDPR compliance, correct metric and imperial units, and valid currency formatting in reports.