
Blind Spot Detection for Van Fleets
Blind spot detection is the clearest way UK van fleets can cut everyday collision risk in towns and cities.
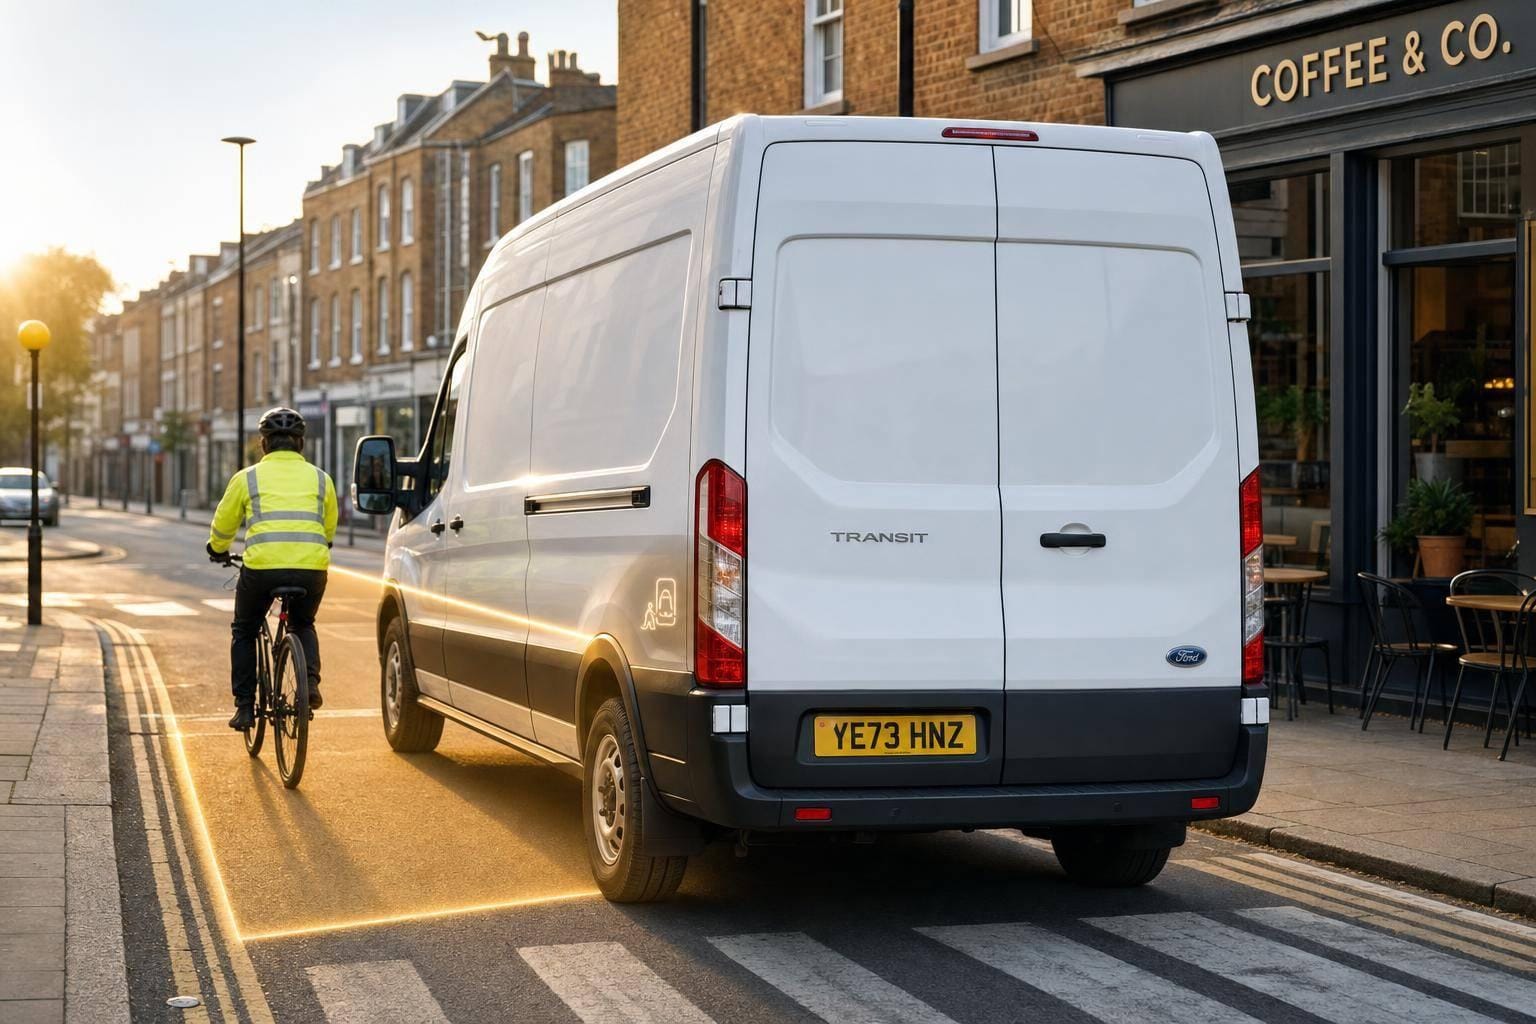
If I run vans in UK towns and cities, blind spot detection is one of the clearest ways to cut day-to-day risk. Vans are linked to 18.6 collisions per billion passenger miles, against 1.8 for cars, and about 64% of those killed in van collisions are pedestrians, cyclists, or motorcyclists.
Here’s the short version:
- The main danger areas are the nearside left, the rear, and parts of the front view blocked by pillars
- The highest-risk moments are left turns, moving off from the kerb, reversing, and depot manoeuvres
- The right kit depends on the job: radar for side risk at road speed, ultrasonic sensors for close reversing, cameras for live views, and AI cameras for spotting people on busy streets
- Alerts only work if drivers know how to react and still use mirrors and direct checks
- Telematics turns alerts into action by linking each warning to time, place, speed, video, and driver details
- Before fitting anything, I’d check vehicle fit, approval records, calibration, driver training, maintenance routines, and insurer data rules
A simple rollout plan is this: fit the right mix of sensors and cameras for each route, train drivers on amber and red alerts, clean and test the kit daily, and track alert data by driver, route, and time of day. That gives me a clear view of where risk keeps showing up and what needs fixing first.
How Blind Spot Detection Systems Work on Vans
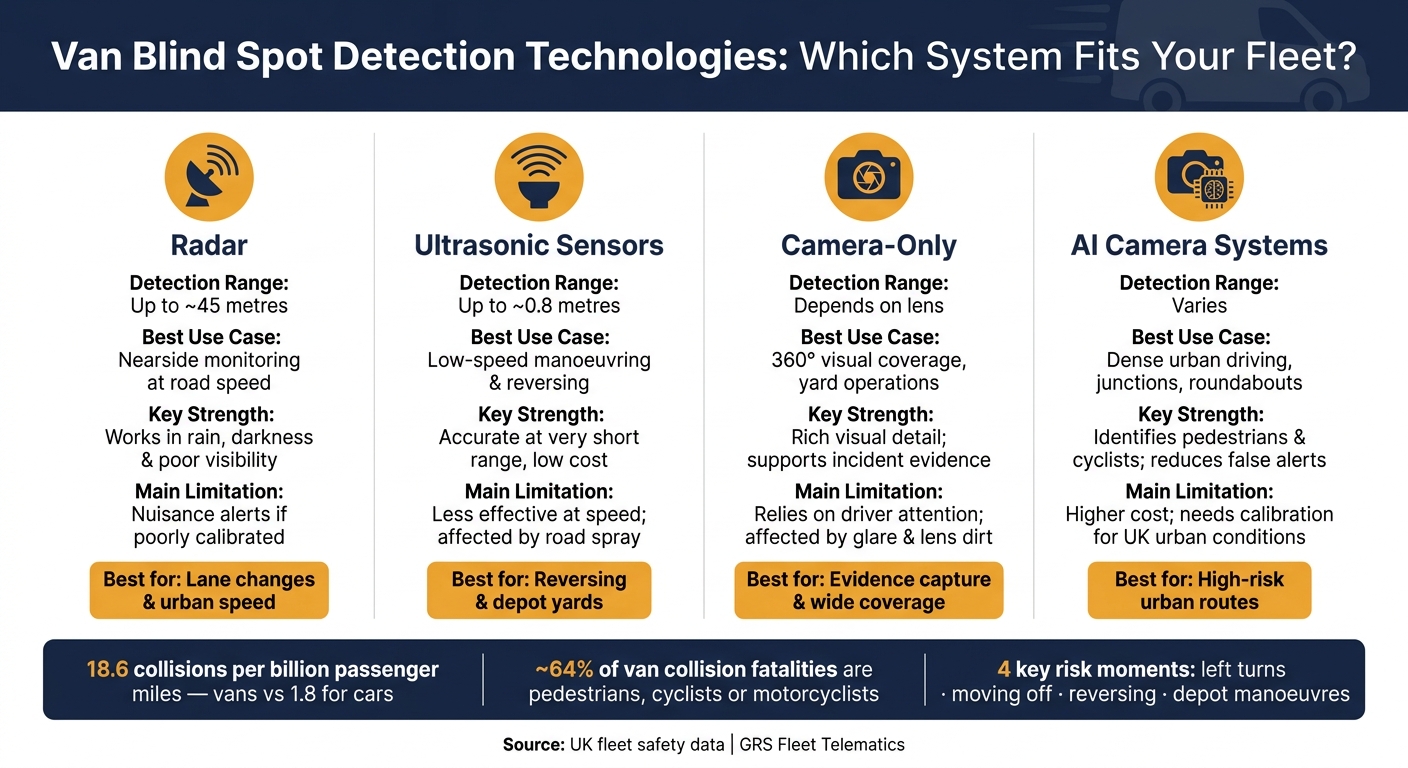
Van Blind Spot Detection Technologies: Which System Fits Your Fleet?
Sensors, Cameras and Detection Zones Explained
Blind spot systems turn the van’s hardest-to-see areas into monitored zones.
Most van blind spot setups use radar, ultrasonic sensors, cameras, or AI camera systems. Each one does a different job. Radar tracks hazards at road speed. Ultrasonic sensors work best for very short-range manoeuvres. Cameras give the driver a live view. AI systems go a step further by detecting pedestrians and cyclists automatically, while cutting down false alerts.
Here’s how these technologies compare for UK van use:
| Technology | Detection Range | Best Use Case | Key Strength | Main Limitation |
|---|---|---|---|---|
| Radar | Up to around 45 metres | Nearside monitoring at road speed | Works in rain, darkness and poor visibility | Can generate nuisance alerts if poorly calibrated |
| Ultrasonic | Up to around 0.8 metres | Low-speed manoeuvring, reversing | Accurate at very short range, low cost | Less effective at higher speeds; affected by road spray |
| Camera-only | Depends on lens | 360° visual coverage, yard operations | Rich visual detail; supports incident evidence | Relies on driver attention; affected by glare and lens dirt |
| AI camera systems | Varies | Dense urban driving, junctions, roundabouts | Identifies pedestrians and cyclists; reduces false alerts | Higher cost; needs calibration for UK urban conditions |
The next job is matching each sensor to the van’s risk areas.
Detection zones are set up to cover the nearside, rear, and front blind spots linked to that van. On the nearside, sensors usually reach a few metres out from the vehicle and several metres along its length. Rear zones are often split into bands: a high-priority alert within 0.4 metres, then an early warning up to around 0.8 metres. Front zones, covered by radar or AI cameras, watch the area around the bonnet and A-pillars, where pedestrians can vanish from view at junctions. Installers calibrate these zones so fixed bodywork and internal racking don’t trigger alerts. The goal is simple: warn for real hazards, not the van itself.
In-Cab Alerts and How Drivers Should Respond
When something enters a monitored zone, the system gives a warning. And the way it warns matters just as much as the warning itself. Most systems use a tiered approach. First, a steady amber LED near the mirror or A-pillar shows that something is sitting in the blind spot. If the driver signals towards that side, or the object gets closer, the alert steps up. That usually means a flashing red light, a louder audible tone, or both. Some systems also use directional audio, so the sound comes from the same side as the hazard.
Audible alerts need to be used carefully. If every little thing sets them off, drivers start to switch off mentally. That’s why many systems only trigger urgent tones when the risk goes up, such as when an object is in the blind spot and the indicator is on. Lower-risk situations are often left to visual warnings only. Installers can usually adjust volume and choose when tones activate, which helps fleets avoid drivers becoming numb to constant beeping.
Driver training should spell out one key point: alerts are aids, not a replacement for mirror checks. A simple response rule works well:
- If the nearside LED shows amber, pause the manoeuvre and recheck mirrors and camera.
- If it changes to red with a tone, stop the move and reassess before going ahead.
That matters because sensors can be blocked by dirt or snow, and cameras can struggle with low winter sun. Logged alert data can then show where risk builds up and where extra coaching may help.
Logged alerts can then do more than warn drivers in the moment. They can also give fleets a clear picture of where problems keep showing up.
sbb-itb-499a7f0
Where Blind Spot Systems Fit Best in Urban Van Operations
Recommended Technology by Driving Scenario
No single blind spot system fits every route. The best choice comes down to the job the van is doing and the risk on that route. A setup that works well for left turns may not be the best option for reversing or moving off from the kerb.
For left turns at busy junctions, nearside radar paired with a side camera is often the best match. Radar picks up hazards in the blind zone, while the camera gives the driver a direct view to check what’s there. That matters in urban traffic, where cyclists and pedestrians can appear fast on the nearside.
For reversing into loading bays, narrow streets, or depot yards, a rear camera combined with ultrasonic proximity sensing tends to work well. The camera helps with rear visibility, and the proximity sensors add distance-based warnings during low-speed manoeuvres. It’s a practical setup when space is tight and small obstacles can be easy to miss.
When pulling away from a standstill, front moving-off detection with nearside monitoring helps cover vulnerable road users both in front of the van and alongside it. That extra coverage can help at lights and junctions, where people may step or cycle into the vehicle’s path just as it starts to move.
On ring roads and arterial routes, side radar with in-cab visual alerts is a good fit for lane changes. It tracks vehicles approaching from the rear quarter, especially in areas mirrors may not fully cover.
| Driving Scenario | Likely Hazard | Recommended Technology | Why It Fits |
|---|---|---|---|
| Left turns in urban traffic | Cyclists and pedestrians on the nearside | Nearside radar + side camera | Detects hazards in the blind zone and gives the driver visual confirmation, with alerts that can be linked to the left indicator |
| Reversing into loading bays or tight spaces | Pedestrians, bollards, walls | Rear camera + ultrasonic proximity sensing | Improves rear visibility and gives distance-based warnings for low-speed manoeuvring |
| Moving off from rest at junctions or lights | Pedestrians and cyclists stepping into the vehicle's path | Front moving-off detection + nearside monitoring | Detects vulnerable road users in front and alongside when the van moves away from standstill |
| Lane changes on ring roads or arterial routes | Vehicles approaching from the rear quarter | Side radar + in-cab visual alerts | Tracks traffic that mirrors may not fully cover on wider urban roads |
Once the right system is in place, it helps to log alerts in telematics to improve driver performance. That gives fleets a clearer picture of where risk keeps showing up by route, driver, and time of day. Over time, those patterns can point to problem spots that need extra training, route changes, or different vehicle spec.
UK Conditions That Can Affect System Performance
Even the right system can struggle when UK road conditions get in the way. Rain, road spray, fog, low winter light, glare from a low sun, and salt or grime build-up are the main issues that can limit blind spot system performance. That’s one reason many operators lean towards radar for nearside detection instead of relying on ultrasonic sensors alone.
A dirty lens or blocked sensor can turn a good setup into a weak one. So daily vehicle checks should include basic cleaning and inspection of cameras and sensors. It also makes sense for fleets to test how a system performs in day-to-day conditions before choosing it for a wider rollout.
Connecting Blind Spot Alerts to Telematics Data
What Data to Capture and How to Use It
Once a blind spot system warns the driver, telematics can log that moment. On its own, a blind spot alert tells you when and where something entered the blind zone. When you tie it to telematics, you get the bigger picture: why it happened, where it keeps happening, and how often.
Each alert should include a timestamp, GPS location, vehicle ID, driver ID, and the vehicle’s speed at the moment the alert fired. Add a linked video clip and any driving behaviour signals happening at the same time, such as harsh braking, rapid acceleration, or harsh cornering, and the alert turns into a searchable event record for each van.
That matters because a raw warning log doesn’t tell you much. A proper event record does. It gives managers something they can review, filter, and act on during coaching or after an incident.
| Data Point | Why It Matters |
|---|---|
| Timestamp | Establishes the exact sequence of events for insurance or dispute purposes |
| GPS Location | Identifies high-risk junctions, routes or delivery zones |
| Speed at Alert | Shows whether the driver was travelling too fast for the situation |
| Linked Video Clip | Provides visual context of the blind zone and any external hazard |
| Driving behaviour signals | Flags if harsh braking or cornering accompanied the alert |
With that record in place, managers can compare alert events across drivers, routes, and sites. Patterns start to stand out. One junction may keep triggering alerts. One delivery area may have more close passes than others. One driver may need extra support with lane checks or positioning.
That makes coaching and route planning based on evidence, not guesswork. Instead of treating alert data as a list of warnings no one reads, fleets can use it as a practical tool for coaching and risk control.
How GRS Fleet Telematics Can Support Safety Oversight
GRS Fleet Telematics can support blind spot alert review with real-time tracking, geofenced safety oversight, and AI-driven driver attention signals, all within one platform and mobile app.
Fleet Manager Checklist Before Rollout
Pre-Rollout Checks for Coverage, Compliance and Training
Once alerts are being logged, you need a control plan for each vehicle. Not a vague fleet-wide plan. A van-by-van one.
Before rollout, check that the system fits both the vehicle and the route. The kit needs to suit each van’s body style, mirror layout and electrical system. You also need to confirm that installation won’t affect the warranty or any safety systems.
Check compliance with UN ECE R46 and UN ECE R151, then file the approval evidence for each vehicle. Keep a compliance file for every van. That file should include installation sign-off sheets, calibration results, photos of sensor and camera placement, wiring diagrams, software or firmware version records, and the supplier’s operating instructions.
It also helps to spell things out in your fleet policy or training materials. Document the system’s operating limits, driver responsibilities and maintenance needs. Then test maintenance intervals and alert clarity in rain, darkness and heavy traffic on representative routes. If a warning is hard to hear or easy to miss in bad conditions, that’s worth finding out before the full rollout.
Use the checklist below to keep fitment, compliance, training and maintenance in step.
| Checklist Item | Records Required | Responsible Team | Review Frequency |
|---|---|---|---|
| Vehicle fit assessment | Compatibility report per model and body type | Fleet Manager | Pre-rollout |
| Installation quality | Per-vehicle deployment log, wiring diagrams, photos of sensor and camera placement | Installation Team | At fitment |
| Sensor and camera calibration | Calibration certificates, field-of-view verification | Technical Support | Post-install / annually |
| Fail-safe behaviour test | Fault-response log; visible warning confirmed within the required response time | Technical Support | Post-install / post-incident |
| Route-based testing | Test results from representative urban routes, confirming alerts trigger at the right time and do not overload the driver with false warnings | Supervisor / Lead Driver | Pre-rollout |
| Driver training | Driver briefing and coaching logs | Operations / Safety Team | Pre-rollout / new hires |
| Sensor and lens maintenance | Daily vehicle check sheets, service interval logs | Drivers / Maintenance | Daily pre-shift |
| Insurance validation | Evidence that footage and data meet insurer requirements | Fleet Manager | Annual |
Give each task a named owner. Vehicle assessments sit with fleet management. Physical fitting sits with the installer. Daily lens and sensor checks sit with drivers as part of the pre-shift routine. Shared responsibility sounds fine on paper, but it often falls apart when no one is clearly in charge.
Key Points to Take Away Before You Roll Out
Choose radar, cameras and alerts that fit the jobs your vans actually do. That includes left turns, reversing, kerbside stops and depot manoeuvres.
In-cab alerts only cut risk when drivers know what they mean and how to react. Poor training can lead to over-reliance, which is the last thing you want. The system should support observation, not replace it.
Once the fleet is live, telematics data gives you a way to judge whether the rollout is doing its job. Track route type, harsh manoeuvres, speed patterns, collision reports, near-miss indicators and repeated incidents at the same locations. Then compare pre- and post-installation trends to spot better driving behaviour, along with routes or vehicles that still bring extra risk. Those patterns can then shape training, route planning and maintenance checks.
FAQs
Do blind spot detection systems work well in rain and darkness?
Yes, blind spot detection systems can work in adverse conditions. But standard camera and AI setups may struggle in heavy rain, fog, or darkness because visibility drops.
To help maintain performance, modern systems may use infrared night vision, thermal imaging, or multi-sensor setups to improve detection in poor weather and low-light conditions.
Which blind spot setup suits urban van fleets best?
For urban van fleets, a four-camera setup that covers the front, nearside, offside and rear is usually the best fit. It gives drivers a much clearer view when space is tight, whether they’re manoeuvring in narrow streets, reversing into bays, or moving through junctions and loading areas where cyclists and pedestrians are close by.
These systems often come with in-cab monitors that provide all-round visibility. For larger vehicles, or fleets facing more urban risk, AI-powered pedestrian detection can add another layer of support with visual and audio alerts.
What should drivers do when a blind spot alert sounds?
When a blind spot alert sounds, drivers should act at once. Check the area around the vehicle, confirm where the risk is coming from, and make a safe correction to avoid a crash.
These visual and audible warnings often become more urgent as the level of risk goes up. So the response needs to be prompt. That might mean stopping a manoeuvre, such as a turn, or pulling back from a lane change.
Training matters here. With regular practice, drivers are more likely to react the right way when an alert goes off.